Share:
A leaky showerhead is a common household nuisance that wastes water and can be annoying. Fortunately, it's often a straightforward fix you can do yourself. The most common causes are mineral buildup, worn washers or O-rings, or a faulty cartridge (if it's a shower mixer) Here, The Bathroom Showroom helps you solve this issue with our step-by-step guide as well as a complete tool list to help you get this job done swiftly.
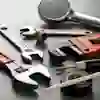
Tools You'll Need:
- Adjustable Wrench or Spanner: For loosening and tightening the showerhead or any fittings.
- Plumber's (PTFE/Teflon) Tape: To create a watertight seal on threaded connections.
- White Vinegar: For soaking and cleaning off limescale/mineral buildup.
- Old Toothbrush or Small Brush: For scrubbing nozzles and threads.
- Bucket and Old Towels/Rags: To catch drips and protect surfaces.
- Flathead or Phillips Screwdriver (Optional): If you need to disassemble the showerhead or a shower valve handle.
- Replacement Rubber Washers or O-rings (Optional): If you determine these are worn.
- Replacement Shower Cartridge (Optional): If the leak is from the shower valve/handle.
Step-by-Step Guide:
1. Turn off the Water Supply:
This is the most crucial first step to avoid a watery mess!
- Locate the isolation valves for your shower (if present, often behind an access panel or in an airing cupboard) Turn them clockwise to shut off the water.
- If there are no isolation valves for the shower, you'll need to turn off the main water supply to your home at the stopcock (usually under the kitchen sink or where the main pipe enters your house)
- Open the shower and let any remaining water drain out. Place a bucket or towel down to catch residual drips.
2. Remove the Showerhead:
For a standard showerhead (fixed to a shower arm): Grip the showerhead firmly with one hand and the shower arm with the other. Turn the showerhead counter-clockwise to unscrew it. If it's stiff, wrap a cloth around the showerhead and use an adjustable wrench or pliers for leverage. Be careful not to scratch the finish or over-tighten when reassembling.
For a handheld showerhead: Unscrew the shower hose from the showerhead itself, and then unscrew the hose from the wall bracket/mixer.
For a leak at the shower arm connection: You'll need to focus on the threads where the shower arm meets the wall.
3. Inspect and Clean the Showerhead:
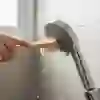
- Check for mineral buildup: Look inside the showerhead, especially at the nozzles and around any internal screens or filters. Hard water can cause limescale and mineral deposits to clog the nozzles and affect internal seals, leading to leaks.
- Soak and clean: If you see buildup, soak the showerhead (or just the faceplate if it detaches) in a bowl of white vinegar for at least 30 minutes, or even a few hours for heavy buildup. You can also fill a plastic bag with vinegar, secure it around the showerhead with a rubber band, and let it soak.
- After soaking, use an old toothbrush or small brush to scrub away any loosened deposits. Rinse thoroughly with clean water.
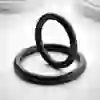
4. Check and Replace Washers/O-Rings:
Inside the showerhead's connection point (where it screws onto the arm or hose), you'll often find a small rubber washer or O-ring. This seal can wear out, flatten, or crack over time, leading to leaks.
Carefully remove the old washer/O-ring using a small screwdriver or paper clip. If it looks worn, damaged, or brittle, replace it with a new one of the same size. These are inexpensive and widely available at hardware stores.
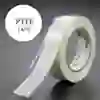
5. Prepare the Threads with Plumber's Tape:
Clean the threads on the shower arm (the pipe sticking out from the wall) with your brush, removing any old PTFE tape or debris. Wrap new plumber's tape clockwise around the threads of the shower arm 3-4 times. This creates a watertight seal as you tighten the showerhead. Ensure it's wrapped neatly and covers all the threads.
6. Reassemble and Reattach the Showerhead:
Screw the cleaned and/or newly-sealed showerhead back onto the shower arm (or hose, then to the bracket) Hand-tighten it first. Then, use your adjustable wrench or pliers to give it a final, gentle quarter-turn or half-turn to ensure it's snug. Don't overtighten, as this can damage the threads or the showerhead.
7. Test for Leaks:
- Slowly turn the water supply back on (either at the isolation valves or the main stopcock)
- Turn on the shower and run both hot and cold water.
- Carefully inspect all connections and around the base of the showerhead for any drips or leaks.
- If you see a leak, turn the water off again and gently tighten the connection. If the leak persists, you might need to re-tape the threads or re-check the washers/O-rings.
What If the Leak Is from the Shower Handle/Valve, Not the Showerhead?
If the showerhead drips even when the shower is turned off, the problem is likely with the shower mixer valve (cartridge) behind the handle, not the showerhead itself. This is a more involved repair:
- Turn off the water: A crucial step!
- Remove handle: Pry off any decorative cap and unscrew the handle screw (often a Phillips or Allen key)
- Remove the escutcheon plate: Unscrew the screws holding the decorative plate to the wall.
- Access/remove cartridge: The cartridge is the internal component that controls water flow and temperature. It's usually held in place by a retaining clip or nut. Carefully remove it.
- Identify/replace cartridge: Take the old cartridge to a plumbing supply store or hardware store to ensure you get an exact match.
- Install new cartridge: Insert the new cartridge, replace the retaining clip/nut, and reassemble the handle and escutcheon plate.
- Test for leaks: Turn the water back on slowly and check.
FAQs When Fixing a Leaky Showerhead:
My Showerhead Is Still Dripping Even After I Cleaned It and Re-Taped the Threads. What Else Could It Be?
If the drip is constant even when the shower is off, the issue is likely with the shower valve/cartridge inside the wall behind your shower handle. The cartridge controls the water flow and can wear out, preventing a complete shut-off. This requires replacing the cartridge.
How Do I Know If I Need a New Washer or a New Showerhead?
If the leak is specifically at the connection point between the showerhead and the arm/hose, a worn washer/O-ring is the most likely culprit. If the showerhead itself is cracked, damaged, or severely corroded, then replacing the entire showerhead might be necessary.
Can I Use Superglue or Sealant Instead of PTFE Tape?
No. PTFE (Teflon) tape is specifically designed for plumbing threads to create a temporary, removable seal. Superglue or other sealants can permanently bond the parts, making future repairs impossible, and may not create a proper watertight seal for water pressure.
What Is Hard Water, and Why Does It Cause Leaks?
Hard water contains a high concentration of dissolved minerals like calcium and magnesium. Over time, these minerals accumulate and form limescale, which can clog showerhead nozzles and build up on internal components like washers and cartridges, preventing them from sealing properly and leading to drips. Regular cleaning with vinegar can help prevent this.
I Can’t Unscrew My Showerhead. It’s Stuck!
Limescale buildup can act like a glue, making it very difficult to unscrew. Try spraying a penetrating lubricant (like WD-40) or a limescale remover around the connection point and letting it sit for a while. Then, wrap the showerhead with a rag for better grip and use an adjustable wrench or channel-lock pliers for leverage. Be firm but avoid excessive force that could damage the pipe.
How Often Should I Clean My Showerhead?
It's good practice to clean your showerhead every few months, especially if you live in a hard water area. This prevents limescale buildup and extends the life of your showerhead.
By following these steps, you can successfully fix your showerhead so everyone can enjoy a more powerful and refreshing shower each time. If you’re looking for further help with more common DIY bathroom tasks, check out our Help & Advice section.
