Share:
A running toilet can be an annoying sound and a significant waste of water, leading to higher utility bills. Fortunately, there are several common reasons for this issue, meaning many running toilet issues are simple to fix yourself as a DIY task.
Here, The Bathroom Showroom helps you deal with this problem by considering a number of reasons for the issue while offering a step-by-step guide to an easy fix.
Tools You'll Need:
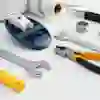
Most running toilet fixes require only a few basic tools:
- Adjustable Wrench or Pliers: For loosening and tightening nuts, especially on the water supply line or fill valve.
- Screwdriver (Flathead and Phillips): For adjusting the float or securing a loose handle.
- Sponge/Towels: To soak up any excess water.
- Replacement Parts: If needed.
- New Flapper: Take the old one to your local plumbers merchant to find a match.
- New Fill Valve: If necessary.
- Float Adjustment Clip: If your float needs repositioning.
- Wire Cutters: To adjust chain length if needed.
Common Causes of a Running Toilet:
Before we get started, there's usually a specific component inside the toilet tank where this problem stems from, including:
- Faulty Flapper: The rubber or plastic seal at the bottom of the tank that opens to allow water into the bowl when flushed and then closes to seal the tank. If it's worn, warped, or doesn't seal properly, water will continuously leak into the bowl.
- Incorrect Float Level: The float regulates the water level in the tank. If it's set too high, the water will overflow into the overflow tube, causing the fill valve to keep running.
- Faulty Fill Valve: This valve controls the flow of water into the tank. If it's defective, it won't shut off properly, even when the tank is full.
- Chain Issues: The chain connecting the flush handle to the flapper might be too long (getting stuck under the flapper) or too short (preventing the flapper from sealing completely)
- Fill Tube Problems: The small, flexible tube that directs water into the overflow tube to refill the bowl. If it's disconnected or positioned incorrectly, the bowl won't fill properly, and the toilet may run to compensate.
- Overflow Tube Height: If the overflow tube is too short or set at an incorrect height for your toilet, water can continuously flow into it.
Step-by-Step Guide to Fixing a Running Toilet
Before You Start:
Remove the Tank Lid: Carefully lift the lid off the toilet tank and set it aside on a flat, safe surface.
Observe and Identify: Flush the toilet and watch the components inside the tank. Pay attention to where the water is coming from and what isn't stopping. This will help you pinpoint the problem.
Step 1: Check the Flapper and Chain
- Jiggle the Handle: Sometimes, the chain gets caught, or the flapper doesn't fully seat. Jiggle the flush handle gently. If the running stops, the chain might be tangled or too short/long.
- Inspect the Chain: Check the chain connecting the flush handle to the flapper.
Too Short: If the chain is too taut, it won't allow the flapper to close completely. Adjust the chain to have a little slack when the flapper is closed (a slight "J" shape) You may need to hook it to a different link or trim excess.
Too Long/Tangled: If the chain is too long, it can get caught under the flapper, preventing a seal. Untangle it or shorten it.
- Inspect the Flapper: The flapper is a common culprit.
Push Down: When the toilet is running, gently push down on the flapper with your hand (the water is clean!) If the running stops, the flapper isn't sealing.
Check for Wear: Look for signs of wear, warping, cracks, or mineral buildup on the rubber flapper. Over time, rubber can degrade.
Clean: If it's just dirty, you can try cleaning it with warm water and vinegar.
Replace: If the flapper is visibly damaged or doesn't seal after cleaning and adjustment, you'll need to replace it.
- To replace: Turn off the water supply to the toilet (valve usually behind or beneath the toilet, turn clockwise) Flush the toilet to drain the tank. Unhook the old flapper from the overflow tube and the chain. Take it to a hardware store to find an exact replacement, or purchase a universal flapper. Install the new flapper, ensuring it fits snugly and the chain has proper slack.
Step 2: Adjust the Water Level and Float
- Check Water Level: The water level in the tank should be about an inch below the top of the overflow tube (the tall pipe in the centre) There's often a fill line marked inside the tank. If the water is higher than this, it will continuously spill into the overflow tube, causing the fill valve to keep running.
- Adjust the Float: The float controls the water level. The type of float will determine how you adjust it:
Ball Float (older toilets): Bend the metal arm connecting the ball float downwards to lower the water level.
Float Cup (newer toilets): These typically slide up and down a rod. Locate the adjustment clip (often a screw or a slide mechanism) and lower the float cup on the rod.
- Check for Waterlogged Float: If you have a ball float, unscrew it and shake it. If you hear water inside, the float is waterlogged and needs to be replaced. This causes it to sit too low and not properly trigger the fill valve to shut off.
Step 3: Inspect the Fill Tube
Correct Placement: The fill tube is a small, flexible hose that goes from the fill valve into the overflow tube. Ensure it's securely attached to the fill valve and points down into the overflow tube, typically about an inch above the top.
If it's disconnected or spraying water outside the overflow tube, the toilet bowl won't refill properly, causing the tank to try and keep filling. Reattach or reposition it as needed.
Step 4: Check the Fill Valve
- Faulty Shut-off: If the toilet is still running after checking the flapper, float, and fill tube, the fill valve itself might be defective. You'll hear water continuously running into the tank, even when it's full and the float is in the "off" position.
- Replace the Fill Valve: This is a more involved repair but still DIY-friendly:
Turn off the water supply: Turn the shut-off valve behind the toilet clockwise.
Drain the tank: Flush the toilet and use a sponge to remove any remaining water.
Disconnect: Disconnect the water supply line from the bottom of the fill valve.
Remove: Unscrew the large locknut on the underside of the tank that secures the fill valve. Lift out the old fill valve.
Install new: Insert the new fill valve into the tank, ensuring the gasket is properly seated. Hand-tighten the locknut, then use a wrench to tighten it another half-turn.
Reconnect: Reconnect the water supply line to the new fill valve.
Adjust: Adjust the height of the new fill valve and float according to the manufacturer's instructions.
Turn on the water: Slowly turn the water supply back on and check for leaks.
Step 5: Test and Reassemble
Once you've made your adjustments or replacements, turn the water supply back on. Allow the tank to fill completely and observe if the running stops.
Flush the toilet a few times to confirm the fix then carefully replace the tank lid.
FAQs When Fixing a Running Toilet
How Do I Know If It’s the Flapper or the Fill Valve?
If the toilet runs intermittently (stops for a while, then starts again) it's often a leaking flapper. If the water runs continuously into the overflow tube, even when the tank is full, it's likely a faulty fill valve or an incorrect float setting. You can also try putting a few drops of food colouring into the tank (without flushing) If the colour appears in the bowl after 10-15 minutes, your flapper is leaking.
Can I Use Universal Replacement Parts?
For flappers, universal models often work, but taking your old flapper to the store to ensure a proper match is best. Fill valves are generally more universal, but check compatibility before purchasing.
How Long Does a Toilet Flapper Last?
Toilet flappers typically last 3-5 years, but this can vary depending on water quality (e.g. hard water can cause them to degrade faster) and usage.
What If I Tighten the Handle Nut and It’s Still Loose?
If the handle itself is loose, there's a mounting nut inside the tank where the handle shaft goes through the tank wall. Tighten this nut (some are reverse-threaded, meaning you turn counter-clockwise to tighten) If the handle mechanism is broken, you'll need to replace the flush handle assembly.
When Should I Call a Plumber?
You should call a plumber if:
- You've tried all the DIY steps, and the toilet is still running.
- There are leaks around the base of the toilet that aren't resolved by tightening bolts.
- The water supply valve won't shut off, making it impossible to work on the toilet.
- You suspect a deeper plumbing issue beyond the tank components.
- You're uncomfortable working with plumbing or don't have the necessary tools.
By following our helpful guidance, you can work to fix any issues you have with a running toilet to ensure a more functional space. Why not check out our Help & Advice section for further guidance on tackling common DIY bathroom jobs?
