Share:
Replacing a bathroom tap is a manageable DIY task that can refresh the look of your bathroom and fix issues like leaks or drips. Here, The Bathroom Showroom offers you a step-by-step guide alongside a complete tool list to help you get this job done with ease.

Tools You'll Need:
- New Bathroom Tap: With any included connectors and washers)
- Adjustable Spanner/Wrench: Essential for loosening and tightening nuts.
- Basin Wrench: Highly recommended for reaching nuts in tight, awkward spaces under the basin.
- Plumbing Grips/Pliers: For extra leverage on stubborn connections.
- PTFE (Teflon) Tape: To create a watertight seal on threaded connections.
- Bucket and Old Towels/Rags: To catch any residual water.
- Screwdriver (Flathead or Phillips): If your tap handles need to be removed with screws.
- Wire Brush (Optional): To clean around the tap hole if there's corrosion.
- Lubricant (e.g. WD-40, Optional): For corroded or seized nuts.
- Pipe Cutter (Optional): If you need to cut and replace sections of pipework.
- Socket Set (Optional): For some tap fittings.

Step-by-Step Guide:
1. Turn off the Water Supply:
Locate the isolation valves: Most bathroom taps have isolation valves (small handles or slotted screws) located under the basin, which control the hot and cold water supply to that specific tap. Turn these clockwise to shut off the water.
If there are no isolation valves: You'll need to turn off your main water supply at the stopcock (usually located under the kitchen sink or where the main water pipe enters your home).
Drain the system: Once the water is off, open the old tap fully to release any remaining water pressure and drain residual water from the pipes. Keep the tap open during the replacement process.
Prepare for drips: Place a bucket and old towels under the tap to catch any water that might still be in the pipes.

2. Remove the Old Tap:
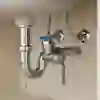
Disconnect water supply lines: Get under the basin. Use your adjustable spanner or plumbing grips to loosen and remove the flexible tap connectors from the copper pipework or isolation valves. Be prepared for a small amount of water to leak out.
Loosen retaining nut: Locate the large nut (often plastic or brass) on the threaded rod that secures the tap to the basin from underneath. Use your adjustable spanner or, ideally, a basin wrench to loosen and remove this nut. This can be the trickiest part, especially if the nut is corroded or in a difficult-to-reach spot.
Remove the old tap: Once the nut is off and the water lines are disconnected, you should be able to lift the old tap straight out of the basin.
3. Clean the Tap Hole Area:
With the old tap removed, clean the area around the tap hole thoroughly. Remove any old sealant, grime, or debris to ensure a good seal for the new tap.

4. Prepare and Install the New Tap:
Read the new tap's instructions: Always refer to the manufacturer's specific installation instructions, as fittings can vary between models.
Prepare the new tap: Many new taps come with a rubber or silicone washer that sits between the tap base and the basin/bath surface to create a seal and prevent scratching. Place this in position.
Apply PTFE tape (if necessary): For threaded connections (like where the flexible connectors attach to the tap tails) wrap PTFE tape clockwise around the threads 3-4 times. This helps create a watertight seal.

Position the new tap: Insert the threaded post and flexible connectors of the new tap through the hole in the basin from above. Ensure the tap is correctly aligned (e.g. spout facing forward, hot and cold indicators in the right place for mixer taps).
Secure the new tap: From underneath the basin, slide the washer and then the retaining nut onto the threaded post. Hand-tighten the nut first to hold the tap in place. It can be helpful to have someone hold the tap straight from above while you tighten the nut from below.
Tighten the nut: Use your adjustable spanner or basin wrench to securely tighten the retaining nut. Be firm but avoid overtightening, which could damage the basin or the tap fittings.
5. Connect the Water Supply:
Attach flexible connectors: Connect the flexible tap connectors to the corresponding hot and cold water supply pipes (hot is typically on the left, cold on the right). Ensure the connections are tight.
Check for adaptors: If your new tap's flexible connectors are a different size to your existing pipework, you may need compression fittings or adaptors.

6. Test for Leaks:
Slowly turn on the water: Once all connections are secure and the tap is firmly in place, slowly turn the water supply back on (either at the isolation valves or the mains stopcock).
Open the new tap: Keep the new tap open when you first turn the water back on to allow any trapped air to escape.
Check for leaks: Carefully inspect all connections under the basin and around the base of the tap for any signs of leaks. Run both hot and cold water through the tap.
Tighten if necessary: If you find any drips, gently tighten the relevant connections. If leaks persist, you may need to re-tape a thread or re-check the washers.
FAQs When Installing a New Bathroom Tap
Do I Need a Plumber to Replace a Bathroom Tap?
For most standard basin or bath tap replacements, it's a DIY-friendly job with the right tools and patience. However, if your plumbing is very old, complex, or in a hard-to-reach area, or if you encounter unexpected issues (like seized pipes or damaged pipework) it's best to call a qualified plumber.
How Do I Know If the New Tap Will Fit My Existing Basin/Bath?
Measure the tap holes on your basin or bath (diameter and distance between them for pillar taps). Check the specifications of your new tap to ensure compatibility with your existing holes. Most standard basin taps are designed for common tap hole sizes.
Do I Need to Use PTFE Tape on All Tap Connections?
PTFE tape is generally recommended on threaded connections where metal meets metal to create a better seal and prevent leaks. It's not typically used on compression fittings that rely on a 'compression olive' to seal, but it doesn't hurt. Always follow the tap manufacturer's instructions.
Why Is the Water Coming Out Slowly After Installing a New Tap?
This could be due to trapped air in the pipes (which should clear after a short time of running the tap), or debris from the installation process. Check the tap's aerator (the mesh part at the end of the spout) as it might be clogged. Unscrew it, clean it, and reattach it. If the problem persists, there might be a blockage further in the pipework.
My New Tap Is Wobbly After Installation. What Should I Do?
The retaining nut under the basin isn't tight enough. Tighten it more firmly with your adjustable spanner or basin wrench. Ensure the tap is held straight while you tighten it.
What’s the Difference Between a Basin Wrench and an Adjustable Spanner?
An adjustable spanner (or wrench) is a general-purpose tool for various nuts. A basin wrench (also known as a sink wrench or tap spanner) is specifically designed with a long shaft and a swivelling jaw to reach and grip nuts in the cramped spaces under sinks and baths, making tap replacement significantly easier.
By following these steps, you can successfully replace your bathroom tap and enjoy an improved and comfortable bathroom. For further help with tackling common DIY bathroom tasks, check out our Help & Advice section.
