
How to Install Bath Panels With Ease
Published: 8th Jun 2023Read Time: 5 min
Share:
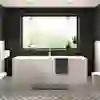
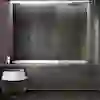
Bath panels are an essential part of any bathroom, providing an attractive and functional way to conceal the unsightly pipework and fixtures around your bath. Installing bath panels may seem like a daunting task, but with the right tools and a bit of know-how, it's a job that can be completed easily and quickly.
Here at The Bathroom Showroom, we’ve compiled a quick guide to help you install bath panels with ease. From measuring and cutting your materials to securing them in place, this guide will provide you with all the information you need to get the job done while helping you to transform your bathroom into a stylish and functional space!
What Are the Types of Bath Panels?
Firstly, you’ll want to be sure you choose the right type of panel for your bath. Bath panels come in various materials, most typically MDF, acrylic, and wood. The type of material you choose will depend on your personal preference, budget, and the style of your bathroom.
MDF bath panels are a popular choice due to their affordability and durability. They’re also readily available in a selection of finishes, including gloss and matte, and can be painted to match your bathroom décor.
Acrylic bath panels are also a popular choice, as they are lightweight, easy to clean, and available in a range of colours and finishes.
Wooden bath panels are considered a more expensive option. Yet, they do provide a natural and traditional look that can add warmth and character to your bathroom.
Does Any Bath Panel Fit Any Bath?
Though there are several common bath panel sizes for both front panels and end panels, there isn't a one-size-fits-all when it comes to a bath panel. Yet, bath panels can be cut to size so you’ll just need to make sure your choice covers the bath you intend to fit.
Standard front bath panels tend to range from 1500mm to 1800mm with the most common measuring 1700mm. For a side bath panel, sizes typically range from 700mm to 800mm
Is It Easy to Change a Bath Panel?
The good news is that with the right tools and materials, installing a bath panel is a DIY job that can be completed easily and quickly. Better still, depending on the type of bath panel you're installing and your level of DIY experience, this task need only take 30 minutes to a couple of hours.
Tools and Materials Needed to Fit Bath Panels
Before you install your bath panel, you'll need the following tools and materials:
- A measuring tape
- A saw
- A drill
- Some screws
- A screwdriver
- Optional adhesive
- Optional sandpaper
A Guide to Installing Bath Panels
Step 1: Measure and Cut The Bath Panel
Firstly, measure the length and height of your bath to determine the size of the bath panel you’ll need. Then using a saw carefully cut the bath panel to the correct size. A good tip here is to measure twice and cut once to avoid any mistakes as not measuring correctly can result in a poorly fitted bath panel. If you're using an MDF or wooden bath panel, you may need to sand the edges to ensure a smooth finish.
Step 2: Fit the Bath Panel
Now placing the bath panel in position, check that it fits correctly. If you find at this stage that it doesn’t, simply remove it and trim it down until it fits snugly against your bath. If you're installing a wooden bath panel, you may need to drill holes to accommodate the bath fixtures. Another handy top here is to drill pilot holes to prevent the wood from splitting.
Step 3: Secure the Bath Panel
Using your screws, start securing the bath panel to the frame of your bath. If you're using an MDF or acrylic bath panel, you may also want to use your adhesive to ensure a secure fit. But, with an adhesive, you’ll need to allow enough time for it to dry before securing your bath panel in place. It’s good practice to ensure beforehand that the screws or adhesive you use are the right types for this job. Using the wrong types here can cause the bath panel to come loose over time.
Step 4: Finish the Bath Panel
If you're using an acrylic bath panel, there's no need to finish this type of material. But, for an MDF or wooden bath panel, you may want to paint or varnish it to match your bathroom décor. Just be sure to sand the surface to create a smooth and even finish before applying the paint or varnish.
Refresh Your Bathroom Design in an Instant With New Bath Panels
Installing a bath panel is a simple and effective way to improve the look and functionality of your bathroom. In just a few easy steps, you can install a bath panel yourself and transform your bathroom into a stylish and functional space.
Just remember to choose the right type of bath panel for your bathroom, and with the right tools and materials, the simple steps above will ensure you achieve a successful installation.
If you’re looking for further help and advice, book an appointment with The Bathroom Showroom. Experts in all things bathrooms, we can help turn your dream bathroom into a reality.